11 October 2013

Jam Session

Last month's jam-making went very well.  The first day, I put up 12 half-pint jars altogether: nine strawberry, three peach.   Over the course of three days' work, we ended up with 36 jars, about half peach, half strawberry; four of them a combination of the two.

I combined a couple recipes (one here and one here) and adapted them, so I guess I can post my version here.  I followed a small-patch process and found it to be manageable for a first-time jam-maker.  Sometime in the last year, I watched a video that compared assembly-line-style task management with performing a repeating task over and over from start to finish and the results were pretty interesting.  I still have some questions about the video itself (and thus, I'm not posting it), but found that doing everything in smaller batches was much easier on my hands as I wasn't repeating each motion without a break to do other things.  Also, while I clung to the recipe pretty fearfully the first time through, the second, third, and fourth time through I had it down and was able to move more smoothly and with more confidence.  If I'd done large batches, I may have done each kind of jam once, but I wouldn't have learned the process as well, which stood me in good stead over the next few days.

Step One Ingredients:
  • 4 cups cut up fruit (I used peaches or strawberries, but this would probably work with other fruit or a blend of two or three, too)
  • 1/2 to 3/4 cup xylitol, depending on how sweet (ripe) your fruit is
  • vanilla extract or 2 split vanilla beans (I didn't measure the extract, but it was between one and two teaspoons.  If you use beans, scrape the beans from the pod and mix them well into the fruit, then drop the pods in too.  I used extract with the peaches and beans with the vanilla.)

Step One Instructions:
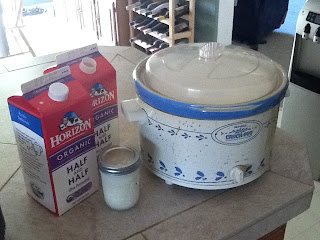
  1. Mix everything up in a bowl, then transfer to a quart jar.  
  2. Let it sit in the fridge at least overnight.  I cut my fruit up on Saturday and didn't start making the jam until Wednesday.  As long as it stays cold and the fruit doesn't go bad, you're golden.

Step Two Ingredients:
  • the quart jar of cut up fruit (which will have shrunk a little and have a lot of yummy juice at the bottom)
  • 3/4 - 1 cup xylitol (again, depending on how sweet your like your jam and how sweet your fruit is)
  • 1 1/2 Tbsp lemon juice
  • a couple pinches of salt (brings out the sweetness better than adding more sweetener)
  • Pomona Universal Pectin (mix the calcium packet with 1/2 cup water and open the pectin packet, which you'll be measuring out with a teaspoon): 2 teaspoons of calcium water and 2 teaspoons of pectin powder

Step Two Instructions:
  1. Pour your fruit into a skillet (cooks faster than a deep pot).
  2. If you used vanilla beans, they're probably very soft right now.  Softly scrape them again and mix the rest of the beans into the fruit.  Discard the pods.
  3. Add xylitol, lemon juice, a couple pinches of salt, and calcium water.  Mix it up!
  4. Gradually add two teaspoons of pectin powder, whisking it in so it doesn't clump (If there's an easier way to do this step, I'd love a comment to enlighten me!).
  5. Heat the mixture to 220˚.  Some instructions will tell you to cook until it's thick enough not to run when you dip a spoon into it and run another spoon across the back of it, but some of my batches aren't jelling the way I'd hoped they would, so I'm going to stick to the thermometer from now on; the somewhat confusing part for me was that those last few degrees take a long time.
  6. Pour into three clean and dry 1/2 pint jars, leaving about 1/2 inch of head room.
  7. Wet bath process the jars for 5 minutes.  Since I'm so new at canning, I'm not going to include instructions, but there are lots of books and websites that break down the process and instruct in safe measures.  I've had only two jars that didn't seal.  I'll re-process them again tomorrow, and if they don't seal after being re-processed, we'll eat them right away.


Variations: I added some lime juice to the strawberry jam to try to develop a more complex flavor, and I think it worked.  I also added apple pie spices to the peach jam and substituted coconut crystals for some of the xylitol.  A few batches of strawberry jam also received a few shots of moscato d'asti.

We've been enjoying the jam with crème bulgare and a grainfree bread recipe that we're still working on (coming when we perfect it).  It's also good on grainfree crackers.

SDG!

13 September 2013

This Morning's Chapter...

...of Linnets and Valerians...

11 September 2013

Jam and Jelly Progress

I spent a lot of Saturday chopping strawberries and slicing peaches (but not so much that I didn't have time to spend with a friend and attend another friend's birthday party).  The fruit has been sitting in jars in the fridge for the last couple days, macerating in xylitol and vanilla (split beans with the strawberries, homemade extract with the peaches).

I also saved my peach peelings; I boiled them for about a half hour yesterday and then let them steep all night to prepare to make peach jelly.  This morning, I strained out the juice and then squeezed all the peelings in a cloth to get every bit of juice.  I have over a gallon (I think - it's in a big mixing bowl, not in a measuring cup or a pitcher).

After school today, I'll be working on my first few batches of jam.  I'm using small-batch recipes so that I don't feel overwhelmed my first time jam- and jelly-making.  I've never canned before, either, but after seeing some of the pictures on other blogs, I realized that it's not as completely complicated as I thought it would be and that I already have the big equipment.  I did invest in a six-utensil canning set, but that was only about $10.

On my radar:


  1. how to make vanilla bean paste
  2. how to make cola syrup with xylitol to mix with club soda for a low-cost, sugar-free soda
  3. learning about aromatherapy (I'm thinking about studying chemistry with my high schoolers when they start next month as a beginning point)
  4. perfecting my sugar-free (almost), grain-free chocolate chip cookie recipe (improved from Alton Brown's recipe and, really, almost there)
  5. experimenting more with almond flour, coconut flour, and whey powder as a substitute for wheat flour (trying to adjust Paula Deen's peach cobbler recipe for dessert tonight; also want to work on sandwich wraps, crépes, pancakes and waffles, and English muffins to go with all this jam!)


SDG!

26 July 2012

Crème Fraîche

Yes, it's been forever.  I've been posting a few things on Facebook that I realized this morning I could post here and then share on Facebook, so that's what I'll be trying to do from here on out.

For those of you who don't know what crème fraîche is, you're in for a treat!  It's a gently soured cream, not as tangy as sour cream but very smooth and very French.  In my efforts to increase the healthy fats in my diet, I've been adding a couple dollops to my scrambled eggs each morning.  Wow!

I've made crème fraîche in the past by adding a tablespoon or two of cultured buttermilk to a quart of cream and letting it sit out overnight.  The rest of the buttermilk was then used for baking.  But I'm not really baking anymore (both in avoidance of grains and in avoidance of adding extra heat to our hot afternoon house).  I bought some crème fraîche from the gourmet grocery store last week (cha-ching!).  I was almost out and I thought I'd give something a try ("I tell you, LaFou, I've been thinking." "A dangerous pasttime." "I know.").

I added a couple large dollops of crème fraîche to a pint of cream and let it sit on a kitchen counter in a mason jar for 24 hours.  It thickened up nicely, but didn't smell quite tangy enough this morning, so I let it go another 12.  I still have to decide if I'll put it into the fridge tonight or tomorrow morning, but it's smelling pretty good right now.  Even though it wasn't quite done, I used a little in my eggs this morning and it tasted great.

I'm not sure how long I'll be able to keep this up.  Hmmm…maybe if I store a couple spoonfuls in the freezer, I can use that to start my next batch, the way I keep a small jar of yogurt in the freezer as starter?  I guess I'll find out!

I've also been making water kefir - just started this week, but that's a post for another day!

SDG!

09 December 2011

Why We Get Fat, by Gary Taubes

So, back to my epic about last year's health quest.

After 13 weeks working on a slow-carb diet and seeing very little in the results department, someone recommended Why We Get Fat on the forum I mentioned in an earlier post. This book was crucial in helping me understand my own body chemistry.

WWGF is an updated, shorter, and easier-to-read version of Taubes' previous Good Calories, Bad Calories. I've started GCBC, but haven't taken the time to finish it as life has gotten in the way, but it's patiently waiting in my Kindle for me.

Taubes questions the theory that eating fat makes us fat (the lipid hypothesis). He looks at other cultures and societies that shared our modern American propensity toward largeness and found some interesting elements. He also looked to the past, both past research and past wisdom. And he looks at body chemistry and lays out the role of insulin in fat storage.

As I read this in April of last year, I realized that the reason the slow-carb diet didn't work for me was that it was still too heavy in carbs. I was too insulin-resistant for that many carbs, even slowly-absorbed carbs, to work.

So, in April, I cut way back on my carbohydrates. And the scale began to go down. I also increased my intake of healthy fats - coconut oil, butter, lard, tallow, the fat on meat, palm kernel shortening, cream, eggs, etc. For about a month, I was eating about 3,000 calories per day and still losing weight easily. But that couldn't continue - the budget couldn't take it. When I cut back on how much I was eating, the weight-loss slowed and even reversed a little.

WWGF isn't a diet book. It's a book about biochemistry, history, and anthropology that explains the why (hence the title) behind most weight-gain, insulin resistance (a.k.a. metabolic syndrome). I've always found that, once I understand the philosophy behind something, the why, applying it, becomes more natural and thoughtful. I don't need someone else's plan if I understand what stands behind the ideas I'm wanting to implement (which is why even good diet books have never been very helpful for me).

By mid-May, I had lost a total of 15 lbs. Not great, but at least the scale was moving in the right direction. After reading WWGF, I read an exercise book, which seemed like the next thing to add. However, when I started doing what the book taught, all weight-loss stalled, and that includes no lost inches and no lost body fat percentage or anything else (although I was getting stronger - but soon my hands couldn't handle the weights I needed for my arms, shoulders, back, etc. - quite a predicament).

I also read another diet book and incorporated that into what I was already doing, but after two weeks, there was nothing happening, so I ditched that one (see how helpful record-keeping can be? I didn't waste that much time on something that just didn't work). That brings us to July, and a new post as I review, yet another book.

SDG!

05 December 2011

The Value of Self-Experimentation and Keeping Copious Records

Almost a year ago, in late December 2010, I finally got to a weight that was my tipping point. I won't say what that weight was, but it was far too high. 2011 was the year I was going to get a hold, not just of my weight, but of my health.

I had struggled with adrenal fatigue for most of my life (not just my adult life - I had symptoms going back to high school, it was only in retrospect that I figured out what they were pointing to). During most of my pregnancies, I'd gained 50 lbs and then lost 50 lbs, but not all of them. The others saw the scale much higher at the end of the pregnancy/nursing cycle, and only one where I lost more weight than I'd gained. In addition to the adrenal fatigue, I was also trying to cope with quite a few other hormonal imbalances.

There had been many times through the years when I'd determine to lose weight. I'd either cut back on the fat, exercise a lot, or both. And each time, I'd simply maintain my weight. It was quite frustrating. As soon as I gave up, the scale started going back up again. And at the end of it, my adrenal glands were in worse shape than when I'd started.

So, back to late December 2010 - I downloaded a newly-released book onto my Kindle that promised me that I'd lose quite a bit in just a few weeks. After I read the pertinent parts of the book, I looked up the author's website. His attitude was less than encouraging, as he said that the promise in his book really didn't apply to women, who had to follow his plan for six to eight weeks before seeing results and even then would only see results for half of each month. He basically said that, if his counsel didn't produce the promised benefits, not to come crying to him.

Well, I tried it his way for six weeks, with absolutely no results. I was motivated to follow his counsel to the letter so that I could claim with all veracity that I hadn't cheated, all so that I could confidently say he was wrong. During weeks seven and eight, I did lose nine pounds. Then, I stalled for the next five weeks. I wasn't the only woman who was so frustrated, as plenty posted in the book's forums about their struggles.

While the slow-carb method of weightloss didn't work for me at all really (I gained back some of the weight I'd lost in weeks seven and eight), I did find the author's approach to self-experimentation to be quite valuable.

I began tracking many different measurements. I weigh myself daily. I measure myself in key areas weekly. I eventually bought a body fat calculator and measure that daily, too (it measures on the low side, so monthly I plug my numbers into a more accurate online body fat calculator and record those results, too). I also began to keep a closer watch on my eating habits (although the food diary didn't last through the whole year, I go back to it occasionally if I get stuck) and the supplements I take, as well as various symptoms (how I slept, headaches, wrist and hip inflammation, fatigue, adrenal soreness, etc.).

All this data helped in so many ways. I began to understand how various things affected me. Some took a few hours to show up, some days, some weeks, and some months, but I had a much better handle on learning what I needed. I learned to understand that daily fluctuations aren't that important. It's longer-term trends that I need to watch.

All this data gave me the ability to evaluate where I was and gave me the tools to figure out where I needed to go.

I haven't started tracking my blood sugar, yet, but hope to get that going soon so I can learn exactly how different foods affect me and can set up an individualized plan (even if it's just knowing what foods will mess me up and which foods might not be such a poor indulgence).

I set up spreadsheets that would take my weight and body fat measurements each day and multiply them out to show me my fat/lean weight. I also began graphing it all.

Whereas before I could find no rhyme or reason for what my weight was doing at any given time, now I could pin it on different things, whether a poor night's sleep or too many cups of sweetened tea or too much high-sugar fruit.

This principle of record-keeping and self-experimentation works for any health issue. The more data points you have, the better. I also found that approaching my health/weight issues as a science experiment was valuable in keeping my emotions out of the equation. I know I can obsess, but I haven't found that to be a problem at all this year.

In upcoming posts, I'll be reviewing several books that I found helpful, as well as sharing how the rest of the year went in my quest for better health (a quest I'm still very much in the midst of!).

SDG!

26 September 2011

Yogurt, My Final Word

I've been asked about my yogurt process lots of times since my series about what I learned in my yogurt journey. I usually send people a link to a Google search of my blog and 'yogurt'. But last night, a good friend said that she always does better if she can see the process, so here it is, all pulled together into one post and with pictures!

This makes a gallon of yogurt (unstrained). I'll include variations throughout.


We start by pouring a gallon of half-n-half or heavy cream (when it's on sale) into the crockpot, set on low.


If we've forgotten to pull our starter (in this case, a small jar from our last batch that was put into the freezer) out the night before to thaw in the fridge, we place the frozen jar next to the hot crockpot to defrost.


Once the half-n-half/cream reaches between 112˚ and 120˚ (about an hour and 20 minutes for us, but your mileage may vary), we fill empty, clean jars with hot tap water to warm up (like filling a teapot with boiling water to warm up before actually making tea with a fresh infilling of boiling water and tea). While the jars warm up...


...ladle some of the hot cream/half-n-half into a measuring cup or a deep bowl.


Pour in the thawed starter.

If the starter is still very cold, the cream can be on the higher side of the temperature range. If using Yogourmet starter (one envelope works great for a gallon of yogurt; I've seen recipes that call for four envelopes for a half-gallon of yogurt -- what a waste!), store-bought, plain yogurt, or we did remember to thaw our frozen started the night before, we aim for the lower side of the temperature range.

I'd like to try a cup of plain, store-bought Greek yogurt as a starter, as I've heard it has more kinds of cultures.

Once the starter thaws, it gets thin and runny, but never fear. The cultures are fine and the yogurt should thicken without a problem. If it doesn't, it's not because of the frozen and thawed cultures. Freezing it keeps it fresher longer and you'll be able to get more batches out of each starter before it goes sour, saving money.


Whip it up until there are no lumps.


Pour back into the crockpot.

If you want to add flavoring, it can go in now. I keep ours plain so we can each flavor it individually or I can use it in Silky Buttery Chicken to marinate the meat (see the link below!).


Fill the warmed and dried jars with the cream/half-n-half and cultures mixture and put the lids on. Don't forget to wash, warm, and re-fill your starter jar!

You could probably add different flavors to each jar.


Put them under a thick bath towel or two on the counter to culture.

I used to use four quart jars plus the small jar, but we've been using our quart jars for so many other things lately that I'm running out. Once we replenish our supply, I'll go back to the four quart jars. They fit into our fridge better and my husband takes one to work for snacks there. They also hold the heat better, but the yogurt still comes out thick, even in plastic containers.


After four or five hours, it's nice and thick. Into the fridge it goes to chill.

If it hasn't thickened up after that amount of time, I'll put a heating pad under the jars under the towel and turn it on low or medium for 20 minutes to a half hour. That always seems to do the trick.

This is a good time to strain it for thicker, more Greek-like yogurt. I'm out of cheese cloth now, but want to try this in the near future. I'll try to strain it overnight in the fridge to get out all the whey.


Here it is! Nice and thick and creamy, topped with fresh blueberries.

Since I'm not baking anymore, I've been throwing the whey away, but now that I'm trying some low-carb baking, I may save it and experiment with the new recipes.


SDG!